I draped the dickie or brown under collar freehand directly onto the neck of my model’s (hubby’s) duck tape dummy. That was my first time manipulating fabric to exaction or perhaps my first successful attempt at it haha. The under collar was a long rectangle of cotton, that I pleated 3 times. It has an interesting angular turn at the end of it just past the overlap. However that’s only really visible in a behind the scenes photo where the outer tunic isn’t being worn. So if you’re planning your own, you may not be interested in being so precise. I transferred this pattern and it’s pleats to the final fabric by ironing the pleats in sharply. Then pinning and ‘connect the dots’ tracing to the final. The pants were a basic quick-sew pattern.
Sewing Obi-Wan Kenobi
*Note: When I mention some as being screen accurate, I merely mean that according to my own eyeballs and how I interpreted, oftentimes blurry screenshots, that what I am stating appears to be true according to reference photos.
I do apologize in advance, the WIP photos aren't particularly thrilling to look at and at times are difficult to interpret with all the cream upon cream.
Before we start, a general word:
All fabric was pre-washed (especially given that the majority of this costume is cotton, which has a tendency to shrink a significant amount)
Also all seams were pressed either before sewing, after or both. I took care not to over press and disrupt the texture of the gauze but this is a critical step in the entire process.
I didn’t really intend to put hours and hours of hand sewing but that’s just what ended up happening. First off, I had been inspired by my little book Couture Sewing Techniques, @hobbinbobbin and other historical costumers. So I was very much thinking of construction in terms of hand sewing techniques. Secondly, the nature of the fabric and the garment ended up requiring that it be constructed in these techniques.
 |
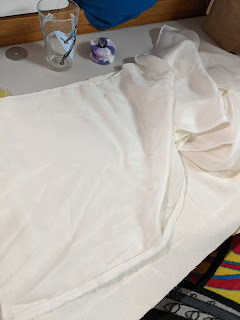
| Beginnings of the tunic, note basting stitches |
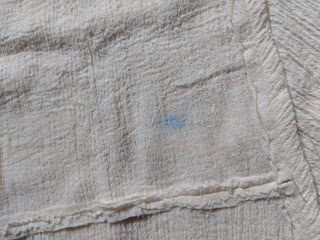
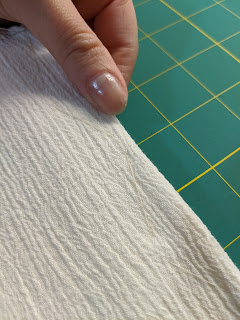
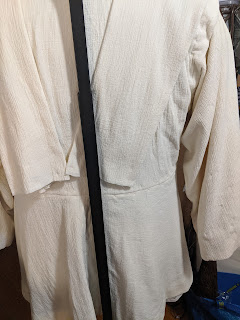
The main body of the tunic, tabards & belt are made of a single ply cotton gauze. The nature of this fabric is texted, puckering runs vertically through the bolt. If you stretch the fabric on the horizontal the texture is distorted or flattened. That meant if any horizontal stretch was to occur it’d ruin the look of the garment. I used unbleached standard weight muslin to flat line the gauze. This solved all of my stability issues and added additional body to the fashion layer (gauze). It also brought the sheerness of the gauze up to fully opaque (although if you look at certain photos of the garment on display, you will see that the main body, at least just on the other side of the collar of the tunic is sheer. Given the likelihood of not having authentic screen accurate fabric, I prioritized the overall weight and visual depth of the garment over this accuracy detail.).

The upper body and sleeves were lined in muslin while the skirt portion of the tunic was left unlined. I did not think the skirt needed any more weight either visually and physically. The gauze continued to be shifty and unruly despite the addition of the muslin underlining. This was due in part to the nature of the gauze but mostly because the pattern pieces were quite large and mostly draped vertically. Normally on smaller pattern pieces, the stitching joining the garment together would ‘fuse’ the fashion layer to the underlining. While the sagging was evident on both the upper body and sleeves of the tunic, only the sleeves would be showing in the final product. I pad stitched the entire surface area of the sleeves before putting them through assembly. I did this on a flat surface. Sometimes I can see the little indentations of the pad stitching showing through the fabric but I’m sure my technique will improve with time.
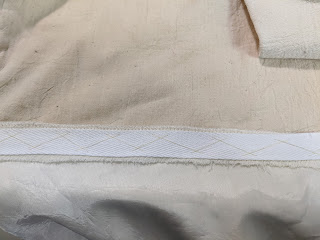 |
| Waist seam with twill tape |
 |
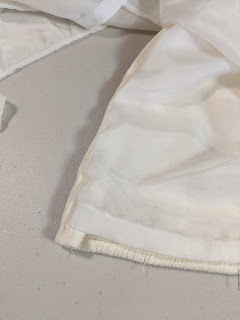
| Inside the tunic, collar seam w sleeve sticking out |
Assembly of the seams was straightforward and the easiest part of the whole costume. I couldn’t really make my mind up on how to finish the seams on the inside so I finished each seam a little different. I did french seams (strong and tidy but bulky) on the shoulders. The collar was pressed open with 2 layers pressed toward the collar and one towards the body. This gave the right visual density to the collar. I then tacked the layers open by hand with an invisible stitch, to avoid visible top-stitching. The skirt to the upper body was finished with the seams pressed open evenly and invisibly stitched open. For additional strength and to prevent the waist from stretching overtime, I spanned a twill tape between the pressed open seam and invisibly stitched it by hand. Although all that invisible hand sewing was unnecessary from a visual standpoint, as it was all going to be covered up by the belts. From a construction standpoint it would have been difficult to get all those layers of fabric through the machine neatly. Even with a walking foot I would still have needed to use to tear away interfacing or tissue. Even then putting the cotton gauze through the machine would to manhandle it.


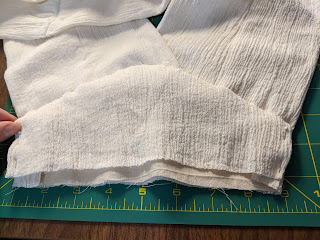
The hems of the fashion layer and lining for the skirt was hemmed by hand before assembly. Again to maintain an invisible look. The outer layer was a 3 inch rolled hem, which is screen accurate and the lining is a half inch. The lining is free (unattached) to the outer layer. The lining fabric is a lightweight poly (probably silk in the actual garment). The same fabric is used to line the sleeves. Lining the sleeves was an interesting process. I could not figure out the technical term for this type of lining so I had to reverse engineer the whole process from scratch. Really red-lined my brain on that one. But the results were very satisfying so I was happy that I used more brain capacity than I ever had in school. Let’s see if I can explain. The sleeve opening has a hem of 3”, the raw edge of the lining is tucked and sewn in here. However the lining dips down and hangs about half an inch from the edge of the sleeve. So here’s what I did. I pinned the raw lining and sleeve edges together even. I turned the first fold of the hem by half inch then folded up a second time for the 3 inch hem. At this point the lining was tucked inside the 3 inch cuff. Taking one pin out at a time I pulled the lining out of the cuff while keeping the hem in place at the 3” mark. This freed the lining so it could hand sew it down like it does is in the reference. I pressed and invisibly hand hemmed the cuff. I then carefully folded and pinned a crease half an inch from the edge of the cuff. I pressed it but did not sew. I laid the sleeve + lining flat on my work surface and secured the shoulder side of the sleeve. I stay-stitched the shoulder end of the sleeve and released the pins holding the lining in place at the cuff end.
 |
| Pinning the shoulder tucks |
 |
| One side sewn |
The sleeves were now ready to be sewn to the body of the tunic. A simple run on the sewing machine at ½ did the job. To do the sleeve tucks I pulled from the seam allowances in toward the collar by about ¾ inch. Resulting in the seam becoming the inner fold of the tuck. The tuck terminated about ¾ down the shoulder seam. Just before the armpit. So the deepest part of the tuck is at the top of the shoulder at the shoulder seam. Then it gradually decreases until there is no longer a fold or tuck. I hand sewed the shoulder tuck permanently in place. I did add some very light shoulder pads in. Two layers of fleece sealed inside scrap gauze. No hand sewing on those just ran ‘em through serger to make a sandwich. But then I of course hand sewed them into the garment.
 |
| Outer hook an bar at collar's end |
 |
| Old inner button |
 |
| hand sewn button hole |
 |
| Old button arrangement |
 |
| New button arrangement, closures no longer visible |
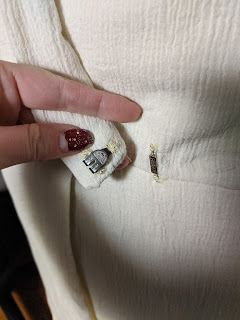
With that ! The tunic is completely assembled. Now onto closures. No zippers for this hand-sewn (now very heavy) pile of cotton! Each flap has a button and a large dress pants style hook and bar per side. For some bizarre reason I wanted the closures to be not visible from the outside (despite once again, the fact it wasn’t going to show when worn because it would be under a belt). So both the buttons face inward. I did screw up and installed one of them reversed and the buttonhole ended up on the outside of the garment. Even though it cost me an extra 2 hours of hand sewing, I took it out and swapped it. The twill tape at the waist came in handy here providing extra support for the closures. I split the seam at the waist where the skirt joins the body. I hand sewed a button here right on the waist seam. Baby’s first hand sewn buttonholes! I knew there was no way of the possibility of my sewing machine handing that much fabric to do an auto buttonhole. The hook and bars went on the tip ends of the collar.


The last piece of the tunic, is the tabards. If you’re not familiar with the term, tabards are the narrow strips going over the shoulders. But historically they’re usually more a coat that goes over your armor to proclaim your heraldry. In the Star Wars costuming universe this is what we call those long skinny pieces that go over the tunic.


After getting sucked into watching Revenge of the Sith in slo-mo, I discovered that the tabards are self lined. (You can see this when they take the bridge after the battle with Doku, one of the tabards on his shoulder gets turned up). In other words, it was the same fabric on the back as the front. In contrast, there are the lower hanging sections of the tabards. Which I thought were lined with the same fabric as the sleeve/skirt. Emphasis on ‘thought’... I later discovered (after I finished the tabards, of course) that in plain sight on a reference image I had since the beginning… the lower section of the tabards were also self-lined. To say I was exasperated would be an understatement. What happened was, I was looking too intently on this behind the scenes photo. What I thought was the lining fabric was actually just light shining through the fabric, giving it transparency. That...or they are two different garments. Which is entirely possible given it’s a costume used for a lot of action sequences. There would have at the very least been a second made for a stunt double.
On to construction. I cut one piece, two layers of gauze, for the upper section of the tabards and centered the seam on the backside. A single layer of muslin down the center of the tabard tube, provides some additional thickness, weight and stability. After a quick gentle press with the iron I pad-stitched around the edges only to keep the layer from shifting. The hanging portion of the tabard is two layers of gauze edges rolled over a single layer of lining. And of course the hemmed edges were done by hand.


This is where the tabards got a little away from me and I had to fix them. I started by attaching the upper and lower tabards together. I discovered the angle at which it met was wrong. Not too far off but it wasn’t clean either. I ended up doing some trimming one side and barely having enough on the other side to roll under. I pressed it open and rolled each side under and felled it down. Tada, bulk reducing and raw edges taken care of. The next thing that wasn’t right, was the length. The front wasn’t hanging down far enough so I scooched the whole tabard down so that it hit the right length. This put the tabard joint seam about 2 inches lower than the tunic waist seam, which it was supposed to line up with originally. This... brought the back up even shorter, considering it was already too short to tuck into the waist seam, which was the original plan. Fortunately! The fabric belt is a whole 6 inches wide and the ends of the tabards hit exactly at the top of the belt! Huzzzah! Good thing too because I was out of fabric… haah... haha..ha.

Just before the belt the tabards cross just a bit. I pinned this in a triangle to bridge the remaining distance from the edges of the tabards to the waist seam. This worked well as it also gave permanence to the angle that tabards overlapped. I sewed down the bottom of the triangle to the surface of the waist seam. Not a very heavy duty job just to attach the two.

Fabric belt: The belt was straightforward and a repeat of processes used to create the tunic and tabards. Two layers of muslin created the structure. Three pieces of plastic boning and one metal (using up odds and ends) help keep the belt flat. Two layers of gauze were cut extra large to create ruching. The part that took the longest was slowly taking in the extra gauze so that I had the right density. I made the mistake of hemming down the ends before trying it on. I had to cut off about 2 inches off each end because the overlap was just too great. I just rolled the edges over and hand stitched them down. I used 3 large size hooks and eyes on the inner overlap and 4 small (standard-ready to wear) sized on the outer overlap. They’re all hidden of course. I had to redo a couple because they didn’t end up placed further enough back. I chose to close the belt this way because the reference I looked at, the way the fabric behaved, appeared to indicate this was the type of closure used. One hook placed at the top of my ‘oopsies’ triangle on the tabards in the back, helps keep my mistake hidden as well as keeps the belt from shifting too much.

Final closures and tacks went as follows. The tabards were tacked at the shoulders near the collar, they really didn’t need this as they stayed put pretty well but I didn’t want constant adjustment during wearing. A teeny tiny hook and bar holds the v where the tunic overlaps on the collar. The outer edges of the tabards attach to the tunic via snaps (unnecessary should have just been tacks). Two hooks and bars secure the tabards where they overlap under the belt, one large (pants style) to take the weight and one tiny one to keep the beginning of the overlap (just above the belt) perfectly in place at all times. There are further hooks and bars etc I’m considering depending on the first run.
Pants were made from a quick-sew pattern from amazon. Nothing interesting to really report other than it was my first proper fly zipper I’ve ever done. Also that I did sew that fly zipper backwards, as per men’s pants. I modified the back and put elastic on the rear half the waist seam.
 |
| Mock-up |
 |
| Mock-up becomes the final garment |
 |
| My little helper assists top stitching arm holes |
 |
| Collars applied |
 |
| Collar extension slips over brown collar raw ends |
 |
| Free hand machined button hole |
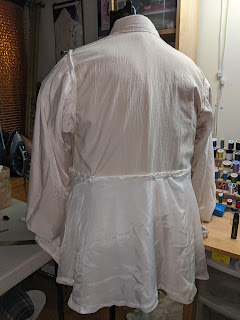
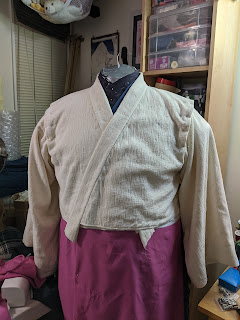
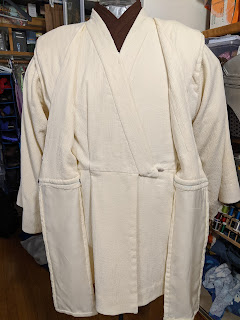
Under-tunic: I originally intended to just make a dickie and detachable sleeves attached to a compression shirt. This would have been ideal to reduce bulk and layers, keeping the costume more comfortable. But I became disinterested in the idea because of the work involved in mating small pieces to a pre-existing garment. Also whispering in my ear was this behind the scenes photo with Ewan McGregor sans tunic. I decided to go full ham and try to recreate this garment as best as I could. I chose the unbleached muslin I already had on hand. While it offered no stretch, it was thin and breathable. It would also work well with the Kona cotton I was using for the sleeves and collar.
The collar was roughly cut out of Kona cotton to match my mock-up. I added some light to mid weight fusible interfacing to the whole piece. I transferred the folds of the mock up to the final fabric by pinning though and doing a bit of ‘connect the dots’. I folded each pleat at one at a time, pressing over a ham as I went to form the collar to the shape of the neck. I didn’t really bother refining the edges, it was just a large rectangle. Everything got trimmed down once I got it attached to the collar. This didn’t work out super well as it took a bit more time trying to figure it out as I went instead of making a plan. Also there didn’t end up being enough fabric to just fold the collar under on the inside and stitch down. No, that would have been too easy, I ended up having to add another strip to the backside and then turn the raw edge under and sew.
Next I cut out the sleeves of the same brown kona cotton. Leaving them extra long in order to create the ruching on the forearm. I left a little too much and had to cut off about 3 inches to get the right density. The thing that took a really long time was the alterations to the sleeves. Being a mostly non stretch fabric, the sleeves were a bit too uncomfortably tight for my husband. For anyone who has worn a too tight woven sleeve you know this a pretty miserable fit issue even if it looks pretty great. Being that only the forearms are really ever going to show I was more than willing to let the elbows out as much as I could. I did have a fair bit of extra seam allowance to work with. I ended up letting them out twice instead of going straight for the max I did a middle ground first. This didn’t make for the cleanest seam allowance, which I trimmed one side to ¼ and folded over the other ½ inch side and hand stitched down. I would like to mention with the majority of this garment being machine finished vs the tunic which was mostly hand finished, I was a bit disappointed I wasn’t able to get the sleeve seam under the machine to top stitch the seam allowance closed. But it’s good I didn’t because I forgot this seam would show past the elbow and now I'm thankful I finished it by hand. The hem of course is also finished by hand. The hand opening to this sleeve is smaller than the thickest part of the hand (this how wide you want to make your openings normally, in woven garments with no closures, in order to get your hand in, lol). However the sleeve wasn’t sitting right on the wrist and this kona cotton had the slightest give in horizontal so I made the opening smaller. It is a little hard to get on and off but now it sits beautifully on the hand. To get the ruching to gather correctly I had to run four vertical rows of stitching around the forearm.
Back tracking a bit to the body of the garment, I cut 3 pieces out of the same unbleached muslin I’ve been using for everything else. One back and two overlapping fronts. These were cut whole and I cut away the shoulder on each side for the kimono-ish style collar that would be the continuation of the brown pleated collar. After sewing on the sleeves I trimmed one side of the seam allowance down to ¼ and rolled over the ½ side to seal it. I used my edging foot to create a clean top stitch that grabbed the turned seam allowance. I did this for the side, shoulder and arm scythe. This was my first time doing such a seam finishing technique on an arm scythe and I was quite surprised how easy and how nicely it turned out (bias stretch makes it all possible :) ). Despite my not so perfect arm hole and this mock-up is my final garment approach.
I cut a strange little triangle to go on the center front of the shirt below the collar (as it is in the reference photo. This is to continue the illusion that the whole undershirt is brown if the tunic happens to shift. I sewed it on one side at a time and inserted the short end into the collar.
I cut two straight strips of muslin to finish off the collar. Folded it half and folded the edges in half an inch. I pulled one end over the raw few ends of the brown pleated collar and attached the rest to the upper edge of the front panels. I then used my edging foot to top stitched all the way around. I caught most of both sides in one go, so not too much time going back and fixing it. I finished up all the side and bottom edges by rolling over ¼ then again by ¼ and top stitching with edging foot. At last, I put a button on the inner panel and a tie for the outer side. A single hook and loop hides in the brown pleated collar under the overlap to keep it tight and secure around the neck.
Thoughts and errors in ‘final’ garment:
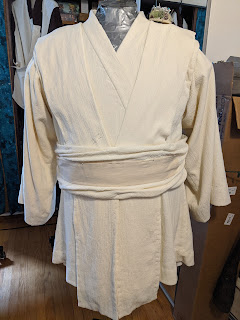
I put the tunic on my model, snapped a pic and did a side by side collage with a reference. And immediately I noticed that the shoulders were nowhere near wide enough to maintain the illusion of proper portions. I had to try really really really really really hard not to let this break me at this very final portion of the costume progress. I had really been sure that I had compensated enough for this earlier in the drafting process and tried not to kick myself for forcing more try-ons during the sewing process. I’m sure every seasoned cosplayer/costumer has been here, to dump umpteen hours into something and basically be finished, for it not to be right. Secondly, which equally killed my mood and probably way more noticeable unless you were doing a side by side like me, is the angle of overlap on the tunic collars was way too obtuse /wide. The collar should run exactly parallel with the tabards and hardly any tunic besides the collar should show in the area between the tabards. My V wasn’t narrow/slim enough. To properly correct this I would need to take the collar off up to about the collar bone area or shoulder seam and cut a triangle out of the body. Then repeat the whole process of sewing that all back together and moving the buttons and hook/bars. I did not do that at this time. When I was fussing with it and had folded over and pinned it to the correct position, I realized I could just leave it like that…(for now) so I ran some hand stitches in this giant ‘pleat’ (it was 2-3 inches deep, meaning the overall correction was 4-6 inches taken in). Out of my laziness I only corrected the over not the under and only moved the bar of the hook and left the button where it was.
Coming back to the shoulder width problem…after doing some investigation on seam allowances and little thinking I figured I could not get more than an half inch on each side additionally just by letting it out. So my extreme and only option without redoing the entire tunic (well I could savage the skirt and sleeves and just redo the upper body), is to slash into the shoulder. Centered under the tabards, I would cut straight down, vertically, to about the armpit. I would then insert a long skinny diamond godet / gore and sew it back up. Sounds really ugly and brutal thing to do to a finished garment so I’m holding off until I have a solid vision of how to execute it. I feel some historical techniques are actually going to save me on executing this cleanly. But once again, this will not show on the final garment since it is all under the tabards which is the only reason I even considered it. However, proportions on a ‘simple’ garment like this are king.


.JPG)

